Translate

Wednesday, March 03, 2004

Come Look Around Our House

I've introduced myself, but here's a look at our house in its current state, no clean-up or tidying done at all. When we expect guests to arrive, for instance, we'd tidy up the best we could to make our place look better. But I think it is more informative to see how we live and what our living spaces look like in a more typical scenario. You will find that there is a lot of clutter and garbage. I'd like to throw a lot of stuff away, especially toys, but both my wife and my son are tremendous pack-rats and trying to throw something out develops into major battles.

When you enter our house from the front door, the first thing you'd see would be our "formal dining room" to your right, which we are using as a lounge and piano practice room for Harrison and as my wife's office:


If you look to your left from the front door, you'll see our 75gallon aquarium in an oak cabinet (see about me in the link on the right sidebars and scroll down to see a shot of the tank) and our main library:


If you walk in, passing the first floor bathroom on your right,

you'll see our "family room"


and walking into the family room, then into the kitchen area, you'll see where we do most of our projects,
homework, and eat all our daily meals (our eating area):


If you look through the windows behind the dinette area you'll see our screened in balconywhich sits maybe 50 feet above ground. Our grill is on a landing at the top of the stairways coming down from this screened balcony.

Here's a look at the kitchen:


I might as well show you the insides of our refrigerator and freezer compartment::


Our garage entry is next to this refrigerator - the garage is boring to look at, just 2 Hondas and some storage gorilla racks in the back with our lawnmower, weeder, blower, camping equipment, strollers, variety of junk.

We enter our house about 80% of the time through this garage door. We've been keeping our garage door itself closed all the time due to a rash of reports in the local papers about teenage girls and boys sniffing around to steal stuff from our neighbor's garages.

Across from the garage door is our pantry. It's very cluttered with stuff, including lots of junkfood which we're trying to do better about avoiding. You won't be interested. Well, here's a look in case you are interested:


Walking back across the kitchen and family room to go upstairs, you'll note a door to the left of the stairs - this door leads down to our basement which is actually pretty impressive and large (about 1200 square feet).

We keep sports equipment, tools, ladders, large toys, old fish tanks, some books down there. I drilled and plumbed in a work sink down there.
Here's our SanteFe Dehumidifier which keeps our basement humidity at 41% or less throughout the year:


Here's our reverse osmosis - de-ionizer water filtration system which we use to make all our drinking and cooking water:

We hope to some day finish out the basement with heat/air, formal full bathroom, suspended ceiling with fluorescent lighting. We've estimated this will cost a minimum of $25k so we've put it off well into the future.

If you open up the basement door, you'll see our back porch:


And you might as well take a look out the backyard:


Get back in the basement and take a look at our old neglected bikes, not ridden for the past 6 years:


And take a look at the back of the basement where we've set-up a small makeshift tornado shelter - please note that this shelter is not likely to work well, but it at least it let's us have a place to go if a twister comes up the lane:


And across from the tornado area are some of my old fish tanks, a 75, a 55, a 30, and a 20gallon:


Let's go back up and out of the basement, then go left and up the stairs

Once upstairs, the first room to your right is my office:


You can see back down into the foyer through a little balcony area next to my office, but across from my office is the master bedroom:


Here's the closet:


Here's a glimpse of the master bath:


Here's airing our dirty laundry bin:


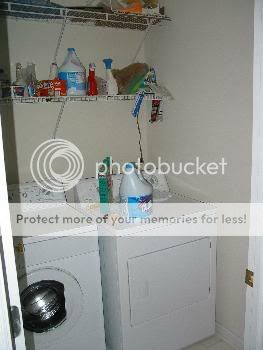
Leaving the master bedroom and walking left down the upstairs corridor, you'll see our little laundry room to your left down the corridor:


Here's our guest room. My parents, my wife's parents, my in-laws, my sister's family, friends of my wife, etc. have all stayed in this room. When you come over, you'll probably be staying here as well. It contains a little desk area, a closet, a couple of dressers, an old antique chair, a small rolling chair, and a 19" tv hooked up to cable and a couple of vcrs:


Here's the 2nd floor hall bath:


At the end of the corridor, here's my son's room:


Here's a look at his most recent mess of toys which he never cleans up:


Just for completeness, walk back down the corridor toward the stairs, and to your right, open up the door next to the master bedroom, walk up and take a look at our cluttered attic.


Tuesday, March 02, 2004

S&B Golden Curry Rice

This is a vegetarian (no meat by-products) Japanese-style Indian dish we just tried making for the first time last week - bizarre as it sounds, this is one of the most popular dishes in Japan, especially among children. You can purchase a package of S&B Golden Curry sauce mix for about $2.99 in most oriental grocery stores and in all Japanese grocery stores. One package contains 2 packets of sauce mix. I packet is enough to make up a mixture to go with 3cups of uncooked rice - enough for a family of 4. Here are the ingredients for this very interesting and flavorful meal:


1.Go ahead and put 3 uncooked rice-cupfuls of rice into your rice cooker and press cook. We use Tohuko Rose prewashed rice - about $12 for 20lbs of it - cheap and excellent rice. Below is our new "10cup" rice cooker made by Zojirushi - it plays "twinkle little star" when you press cook, it plays some unrecognizable tune when the rice is all done, it has "neuro fuzzy-logic" rice cooking and warming functions. It is shaped like a little piggy bank:


2.Chop up your vegetables, your tofu, and 2-3 crisp peeled apples. We use 2-3 small Idaho potatoes, 1 small packet of baby carrots, 4 scallions, 1 package of firm tofu chopped to 1cm cubes, and 2 chopped crisp apples soaked briefly in lemon juice.


3.Put about 1/3 cup of Canola oil in a Wok-type pan and sautee your chopped potatoes, carrots for about 15 minutes, add your chopped onions and tofu and sautee an additional 10 minutes or so. Finally add the apples and let sautee just another 5 minutes or so and set all the mixed vegetables aside in a bowl.
Here are the vegetables before cooking:

Here they are after cooking and set aside:


4.Now open up 1 packet of the S&B Golden Curry sauce mix - we use "mild" flavor. I've heard the "medium-hot" ones taste better.


Pour out about 3cups of filtered water and bring to a light boil in the now emptied Wok (or another pot). Place the sauce mix pellet into the roiling water and stir and break-up to make it dissolve - this can take several minutes:


5.When the sauce is dissolved well, finally dump all your prepared vegetables including the apples into the sauce mix and allow to simmer for about 5 minutes:


6.Assuming your rice is done by now, pour out desired portion of white rice into a deep bowl, then ladle the Curry sauce vegetable mixture onto your rice.

RESULTING MEAL:


This preparation only takes about 1 hour and will be filling for 3-4 "Jethro"-type adults. You can add some Indian-style Nan bread, and maybe some pickled side-dishes for extra flavorings.


Monday, March 01, 2004

MAKING PIZZA AT HOME


Beginning here, I will be posting as we go along various descriptions of food our family makes and eats. The first post will be of a favorite - pizza, though we can get burned out on them. I got the recipes from various pizza recipes both online and in various cookbooks and I believe we are close to mastering pizza making. We've even made pizza on our outdoor grill. The problem with making pizza at home is that you do need to purchase some equipment to do it right - a large pizza peel, a pizza stone, a good rocking pizza cutter - we bought our stuff at William-Sonoma and some pizza cooking websites. We usually make a large batch of pizza at one time and refrigerate the leftovers which we eat over the ensuing several days.


Here are the ingredients we use:


1. One of the keys to getting the dough to rise is to use non-chlorinated, clean water. We used r/o-d/i water which we make ourselves with our own r/o-d/i filter in our basement. We refill 3gallon jugs of it and keep it going with one of those standard water coolers which keeps a ready supply of ultra-pure - 0 TDS, 0 conductivity water on hand in our kitchen. We also own one of those nifty Japanese Hot-water pumps and keep this filled with this filtered water - this gives us an instant supply of boiling hot water for use to make tea, to make ramen noodles, or to use to mix the perfect temperature water (in concert with our cooled cooler water) for various projects:


2. Using this water mixture you must create water somewhere around 120-150F and mix into it about 1TBSP of salt and 1-2 TBSP of sugar. Then you add about a TBSP of good yeast and proof it - wait a few minutes until you see active explosive blooms of yeast culture growing into a foaming pile:


3. Then we measure out 1.5 cups of bread flour, followed by 1 cup of wholewheat flour, then followed by a final 1.5 cup of bread flour into our KitchenAide mixing bowl, add 3 capfuls of extra-virgin olive oil - and when our yeast has been proofed, add the entire bowl of yeast-proof mix into the mixing bowl. Here's how the kitchenAide bowl looks before the yeast-proof mix is added:


And here's how the mixing bowl looks after the yeast-proof goop is added to it and stirred up with a spoon:


4. The mixer is then turned on low and we watch as the gooping mixture magically transforms in a matter of a few seconds into formed dough - the key is to get a feel for the correct consistency of the dough by adding the perfect amount of water and flour. You can never quite pre-judge the exact amounts of each - you must watch the behavior of the mixture against the sides of the mixing bowl (cleanly pulls away from the mixing bowl and forms into organized balls with elasticity on the dough hook):


Alternatively (if you are a purist) you "punch the dough down" for 20minutes by hand (exhausting), or do what we do: let the kitchenAide mixer do all the work for you - you can run the thing on Medium-High, all the while frequently tucking the spinning-up tops of the dough back under the dough hook in the mixer (so the dough ends don't fall out of the mixer) - the mixer can do the job in about 5 minutes or so.
You must do the final test of dough consistency: you poke a belly button into the formed dough and watch to make sure your withdrawn fingerhole starts collapsing inward quickly - no stickiness should be felt on your finger and the hole should not completely disappear either - this is all very subjective stuff:


5. You pull out the end result, powder it up with some flour, then let it rise in a warmed bowl covered with a towel. Note my dough right after it goes in the bowl, then the same doughball about 1 hour later (after the "first rise"):


You cover it with a towel to prevent drafts from disturbing the action of the yeast - the warmer your dough, the faster it rises - we usually go ahead and start the oven - at 455F to heat the pizza stone in the oven, and let the warm oven heat the rising dough over a towel:


6. After 2 rises, we punch out the dough and flatten it:


7. We roll the edges (to hold in the sauce), ladle on the tomato sauce:


8. We then slide the pre-pizza onto our pizza peel (you have to keep the bottom of pizza dusted with flour),
add toppings:

Add Mozzarella:

Slide the pre-pizza onto the pizza stone in the oven:


9. In about 7 minutes at 455F, the pizza is done and you peel it off the
pizza stone and onto a prepared surface (we use an aluminum cookie sheet):


THE FINAL PRODUCT: